Digitizing a Dodge Dart
Share
While the first 3D print on demand parts we've offered have been shift knobs, 3D print on demand also lends itself to low volume interior trim pieces. As the owner of a 1966 Dodge Dart, I know very well that older cars that aren't quite the most popular with collectors can be very hard to find little trim pieces if you break them. And after 50 years in the sun... you're going to break them.
So I'm starting my repop interior parts line with parts I have digitized from my 1966 Dodge Dart, when the parts are intact or at least there is enough of the part left to get the key measurements. The dash vents are notorious for crumbling after decades of heat and sunlight, so that's where I am starting.
These days, sophisticated 3D scanners can take a part and convert it into a computer model in minutes. And you won't find those here. For one thing, they're expensive. For another, they will end up digitizing years of damage and nicks. And they can't scan pieces that have broken off and vanished. So I'm going to be modeling these parts the old fashioned way.

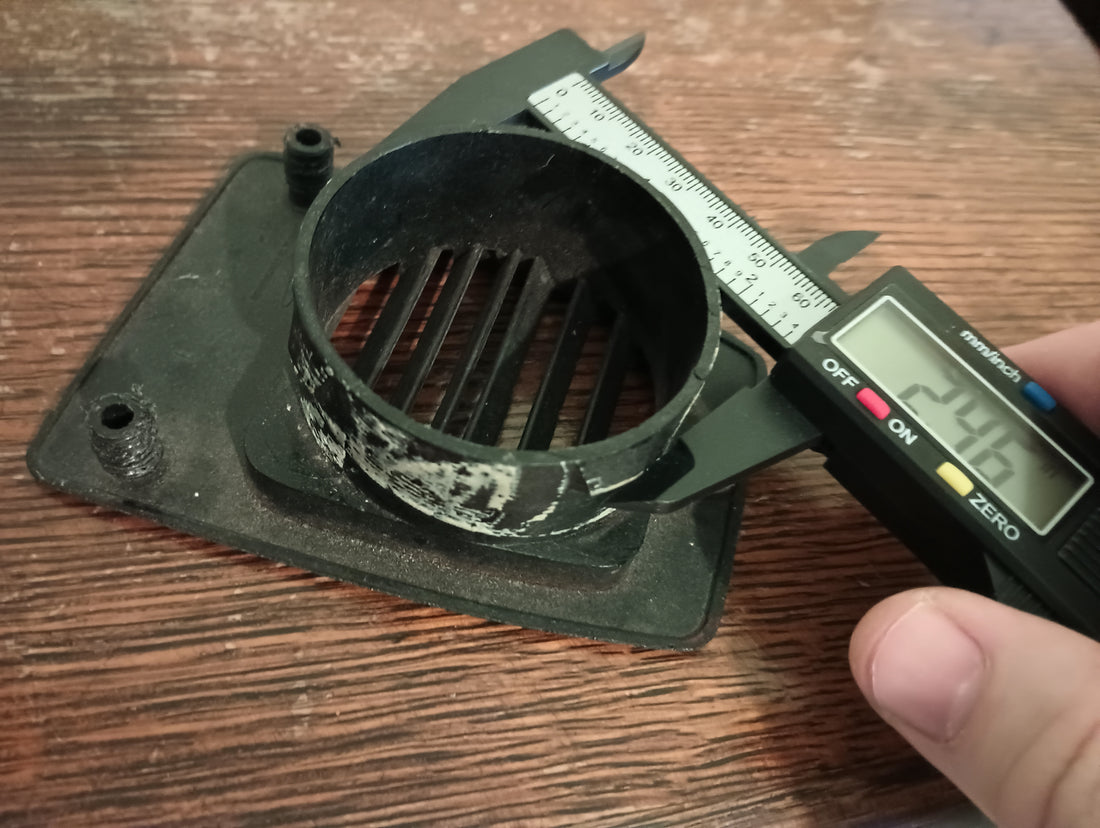
Step one is to measure the parts - sometimes with a ruler, sometimes with digital calipers. Often you can make educated guesses as to the designer's intent - for example, an old Chrysler is going to have parts sized in fractions of an inch. Hackaday has a very good article on how to do this.

I'm modeling the parts with Freecad. Its main virtue is that it's free, even for commercial use. And that it's not OpenSCAD, which is even worse. Unfortunately, it's very buggy and clunky. If this takes off, I'm planning to get something like Inventor or Solidworks. Having a reliable and quick CAD program is worth the money, if you have the money coming in.

Once I have the part, I print a prototype. I use PLA, an easy to print plastic, even though production parts will use something more heat resistant. I also won't be printing the production parts with an Ender 3 - these are made at a print farm on higher end commercial equipment, but if I can print it with an Ender, a commercial print farm should have no trouble printing with their gear. Once it's done, I can test fit the part and make adjustments as needed. This go-round ended up with mounting bosses a few thousandths of an inch too far apart to fit the dash vent mounting holes. So the next iteration will have these moved. Once I have a satisfactory 3D model that I can confirm fits the car, you'll see this dash vent uploaded to the site.

And I ended up breaking the glove compartment liner trying to get the vent out. Guess what part I'm going to be working on next?
